Cloth sails manual
Introduction
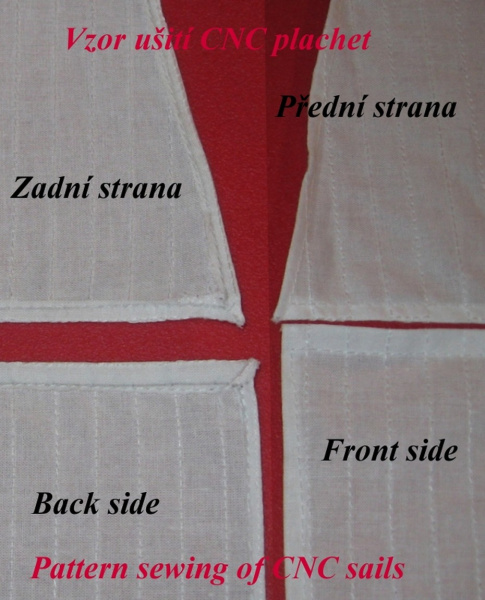
Sails are indispensable for sailing ship. I only accept plastic sail substitutes in kits as a template for real canvas sails. Since many find it difficult to make sails, I offer canvas sails of excellent quality sewn on a CNC sewing machine. In the production process, I try to pay attention to all the technical details of how the sails were sewn to match the historical reality. Orders can be placed including patination or with printing. It is also possible to buy the canvas separately.
Canvas, cloth, stitching – batiste – 100% cotton, grammage – 88 gms. Stitching is also by thread from 100% cotton or colored synthetic threads.
Before you buy sails
Scale - Before you buy the sails, you have to take into account for which model, in what scale the sails will be. For large scales from 1:xx to 1:150 you can buy sails sewn with all the details such as curved edges, reefing strips, side and corner or additional reinforcement, sail lining. For scales 1:160 and above I recommend only sails sewn on canvas, which you can further adjust.
Set up sails on ship – It is advisable to think in advance whether you will put all sails on the model or only some of them. Here you can leave out the studding or staysails. And also whether and which sails will be furled or only partially furled. Depending on this, I recommend buying standard sails or shortened and reversely bevelled sails to imitate furled sails so that they don't look unnaturally bulky on the yard.
Patination and printing – The sails were mostly stained dirty beige or grey by use and mainly by impregnation. Some of the sails were made of coloured fabrics, mainly for galleys and xebecs. And some sails had coats of arms, crosses and other symbols painted on them. This should also be taken into account when ordering.
If you buy printed sails, acetone-based varnishes cannot be used for impregnation, as this would damage the print!
Preparation of sails
Sail type by boat - The sails were divided by their appearance and construction into main groups according to the region of origin of the ship, continental and English.
An example of the appearance of Continental and French sails is the sails of L' Ambiteux. Descriptions of French sails can also be found, for example, in specialist literature, in The Seventy-Four Gun Ship vol.3
A detailed description of English sails can be found on the Historic Naval Shipa Associatio website, specifically in The Elements and Practice of Rigging and Seamanship/ Sail making. And a specific example of such sails are those of HMS Victory.
Before we place the sails directly on the model, we need to do the following steps:
Painting of sails:
The sails of some, especially American ships, such as the USS Constitution, their schooners and brigs, had sails made of cotton cloth, which bleached in the sun with use in salt air. That's why I recommend leaving these sails white. Most of the other sails were beige or grey. You can achieve this by patinating in a strong decoction of black tea, coffee, spirit stain or fabric paint. The longer the fabric is in the solution, the darker it becomes. That is why I am adding a piece of fabric to the sail set, so that you have the opportunity to do a test.
It didn't pay to stain the sails in a broth of onion skins. The color was kind of an old yellow afterwards, and it got even more yellow when I reinforced them with Sidolux to hold their shape. But it's possible I just didn't have the onion skins dried properly, or the young onions....
Iron the dried sails, cut off excess threads.

Finishing sails – Bolt rope and Reef rope, Bowlines:
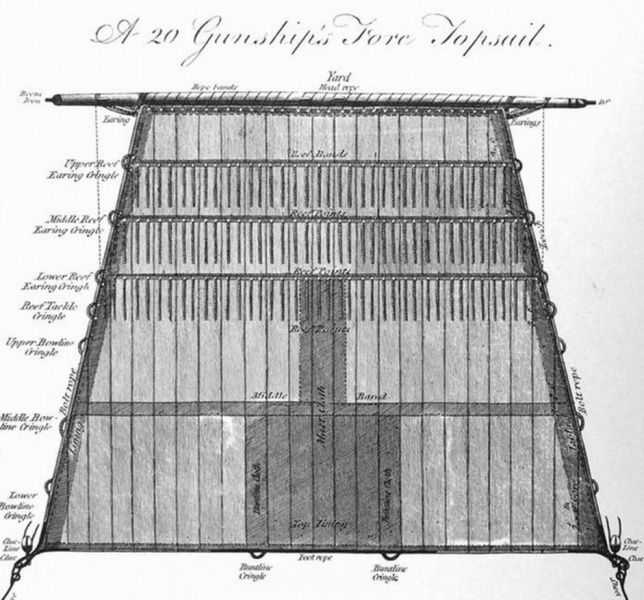
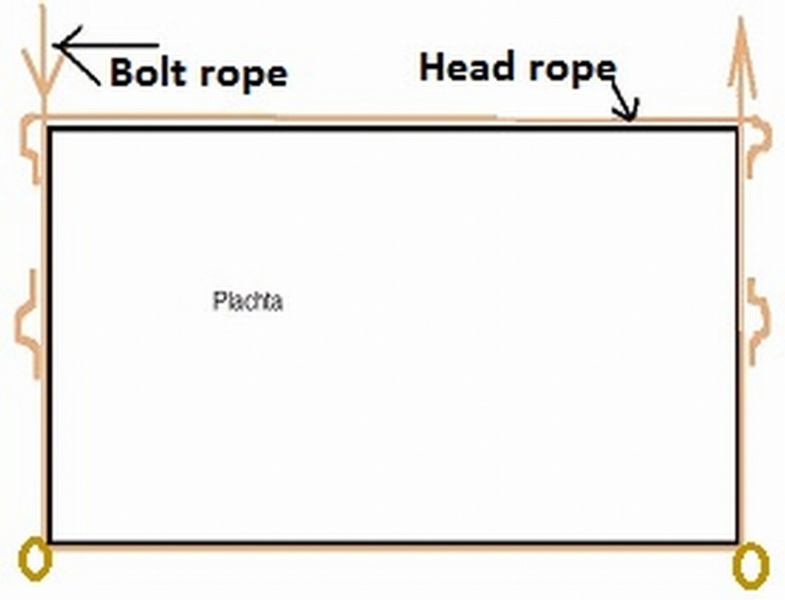
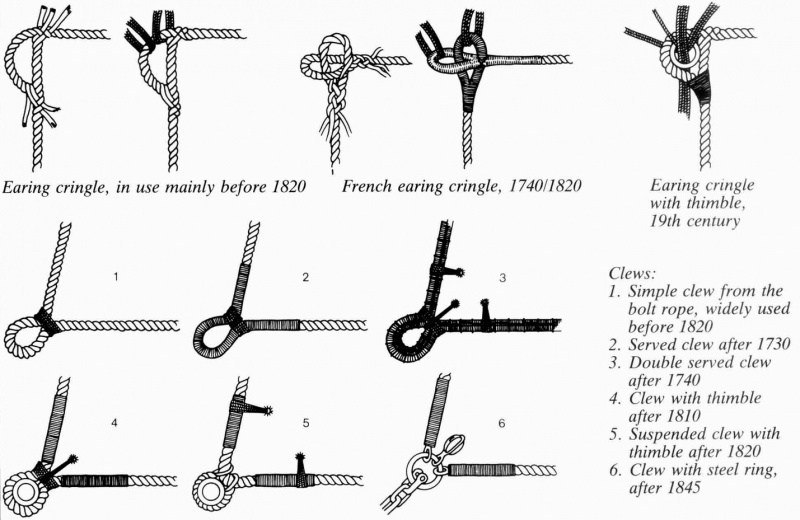
Accessories of sails - The circumference of the sails was strengthened by a so called bolt rope. This rope was sewn to the rear edge of the sail. It was of two pieces, the top part "Head rope" and the "Bolt rope". The corners of the rope formed eyelets - see fig. Over the top eyelets "Earings", the sail was attached to the yard, while the lower eyelets were used to attach the tension and cassation ropes, reins and halyards. Around the perimeter of the Bolt rope, eyelets were attached for lashing additional ropes handling the sail. Reef points were attached in the Reef Band to undercut - reducing the size of the sail area.
Bolt rope - The diameter of the Bolt rope was, like everything else on the boat, determined by the ratio of the thickness of the ropes to the respective Shrouds. The lower sails (Course) had Bolt ropes 3/4 the diameter of the lower shrouds, the top sails had Bolt ropes of the same diameter as the shrouds. The other sails had appropriately thinner ropes.
Before attaching the rope itself to the sail, you could attach eyelets (cringles) to the Bolt rope on the large scales (1:xx to about 1:100), where the other control ropes were tied in. Stretch the rope along the sail, marking the attachment points for the eyelets, leaving enough overhang at the ends. Remember that Bolt rope is one piece along the sides and bottom, so I recommend gluing the eyelets to the rope and the rope itself to the sail on each side. Make the eyelets from the same rope, and attach it to the Bolt rope itself either by gluing it with gel second glue, or wrap the ends of the eyelets with thin thread as shown in the following picture.

Attach of the bolt rope – Before you start attaching the rope to the sail, find out where the sail belongs, how it is turned and where the top and bottom and the front and back are. Each sail has a wider curve on the side attaching it to the jib or mast, but be careful not to reinforce it with more canvas. You can sew the rope to the sail or glue it with flexible gel second glue - usually glue is used for this connection. To make the job easier, clamp the sail in long, self-tightening tweezers, for example, or between two spars so that only part of the edge of the sail protrudes over the edge. Apply the gel superglue, attach the prepared rope correctly to the edge of the sail and press lightly against the edge of the sail. For easier and faster drying, it is advisable to slightly dampen the rope as the moisture present speeds up the drying of the second glue. Once dry, make a loop on the bottom corner of the sail, preferably using a log (e.g. skewer) so that the loop is the same on both sides. Wrap the eyelets at the corners with thread (see the picture below for options throughout the story). Do this on all sides of the sail. Work in this way on all sides of the sail.
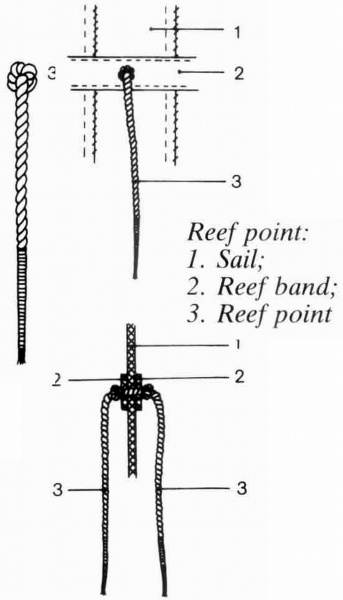
Reef points - Reefing ropes are ropes that were used to tie the sail to the yard when it was necessary to reduce its area. They were threaded through the reefing belt to reinforce the sail. There was a knot at the sail so that the rope could not move to one side or the other. You can make reef points out of thinner rope. To make the ropes the same length, trim them to the same length after threading them through the sail.
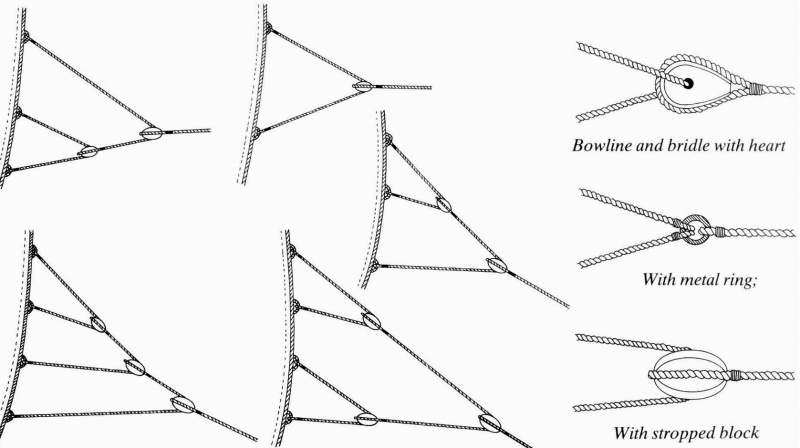
Bowlines – Simply put, they were used to shape the side edge of the sail so that the sail would not catch the wind from the front. Again, the implementation varied according to the time and place of the ship's construction. Bowlines should be attached to the sail at this stage, or when the sail is on the yard, as it is much harder to do later on the model.
Different types of Bowlines:
Attach of the sails to the yard and stay:
Yard sails - Attach the sail to the yard only when the other equipment (blocks or footropes) is attached to it. Again, pay attention to where the top and bottom, front and back of the sail are. The attachment of the sail to the yard has evolved over time, and is aptly illustrated in the attached picture.
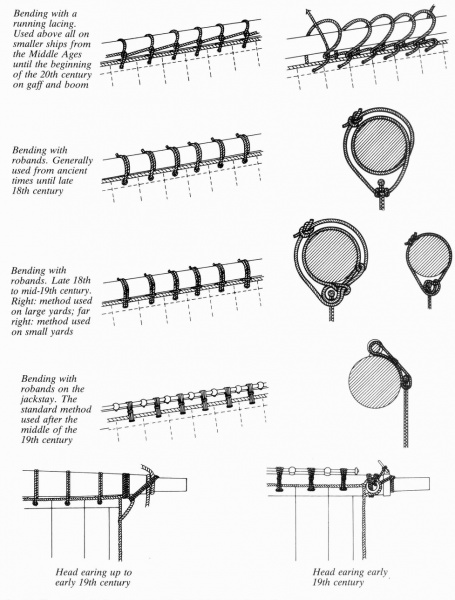
Stay and Jib sails - The sails were hung on the stays by wrapping rope around them, later they were attached to the stay by clamps so called "Hanks", which were sewn to the sail and strung on the stay.

Shaping of sail:
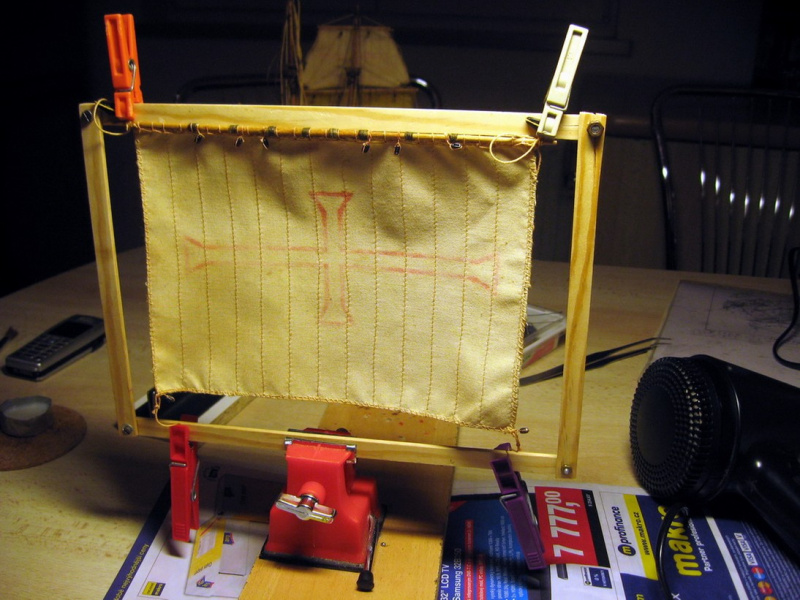
As a final step before the yard and sail are attached to the mast, the sail must be given its shape. There are various ways to shape the sail. Someone shapes the sail according to plastic templates, someone according to a bottle of the appropriate diameter. I attach the finished sail to the frame, the corners of the sail are attached in the same way as if it were attached to the boat, see picture.
First, iron the sheets thoroughly so that they are straight and free of creases and scratches. You can paint the sails with your choice of reinforcing varnish (ideally a matt varnish, I use matt acrylic Sidolux), or a very diluted Hercules. You can also use a different reinforcing varnish, depending on how everyone has tried it. Maybe a classic liquid starch for canvas. And for small sails, hair spray is fine. Choose the dilution of the impregnating solution so that it soaks into the sail well, does not form a visible layer when dry, but is nicely soaked in, and the sail is stiff and holds its shape well. Blowing into the sail with a hairdryer will dry the impregnation and get the optimum shape. At this point (while it is drying) you can arrange the various folds in the corners or folds if you want them on the sail. It is especially important to do this when you are making a folded or undercut sail. With a folded sail, roll it all up and tie it straight to the yard.
If you buy sails with a print, you can not use to impregnate paint of acetone-based, as it will damage the print!
Attach the sail to the boat, on which you have already prepared the rigging. My preferred procedure is to have all the fixed rigging installed and the running rigging secured to the mooring point on the boat, including the decorative coils of rope, before starting to fit the yard.
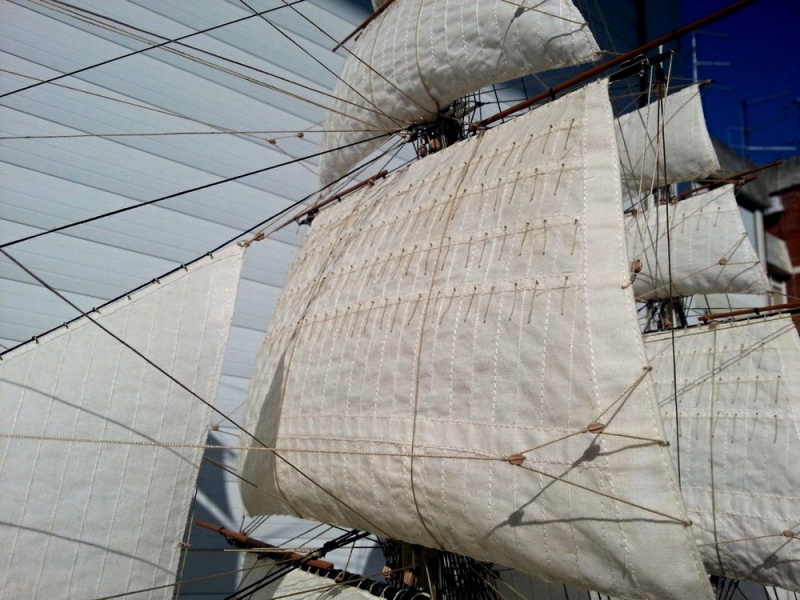
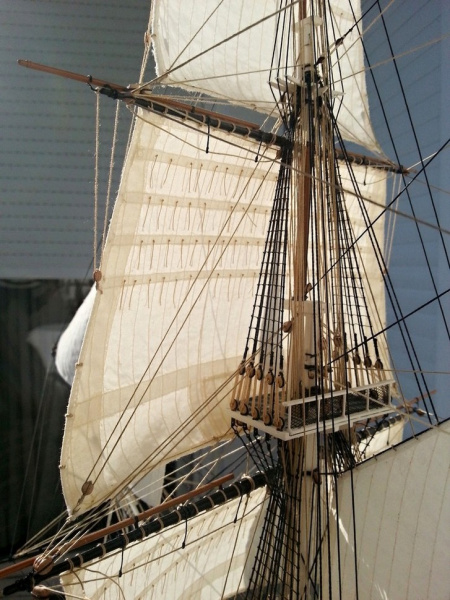
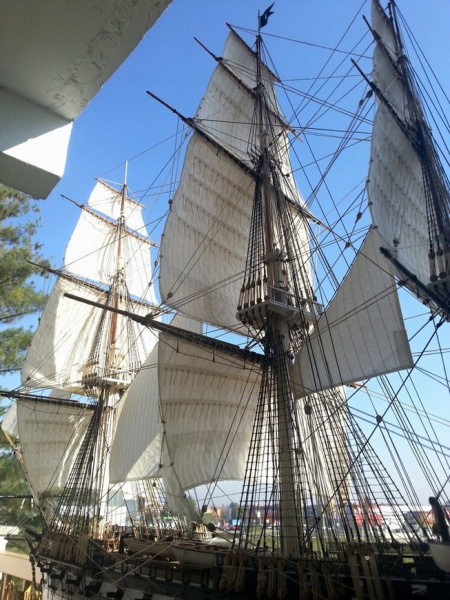
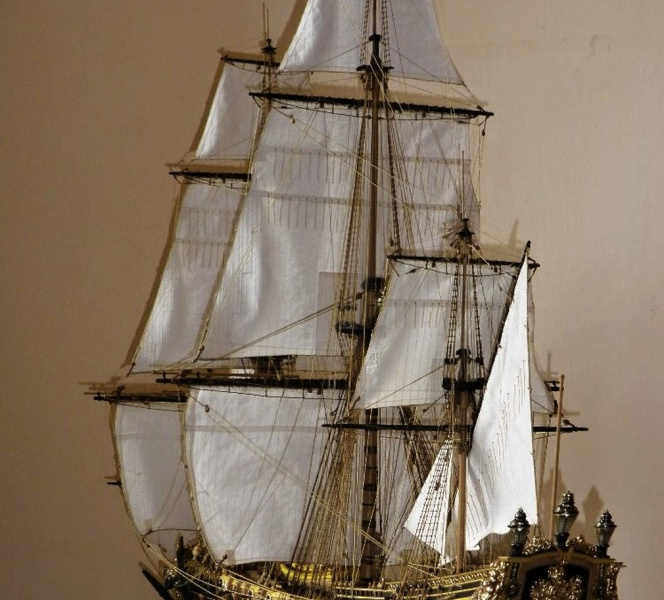
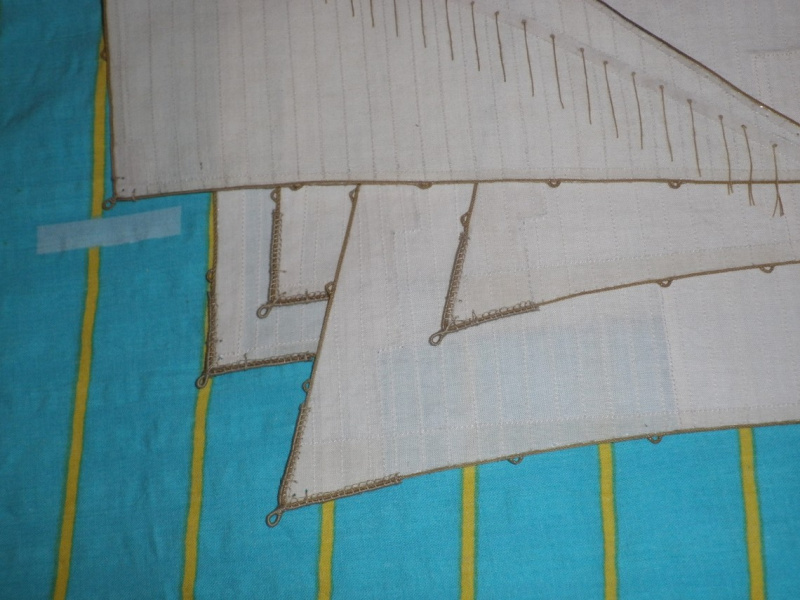
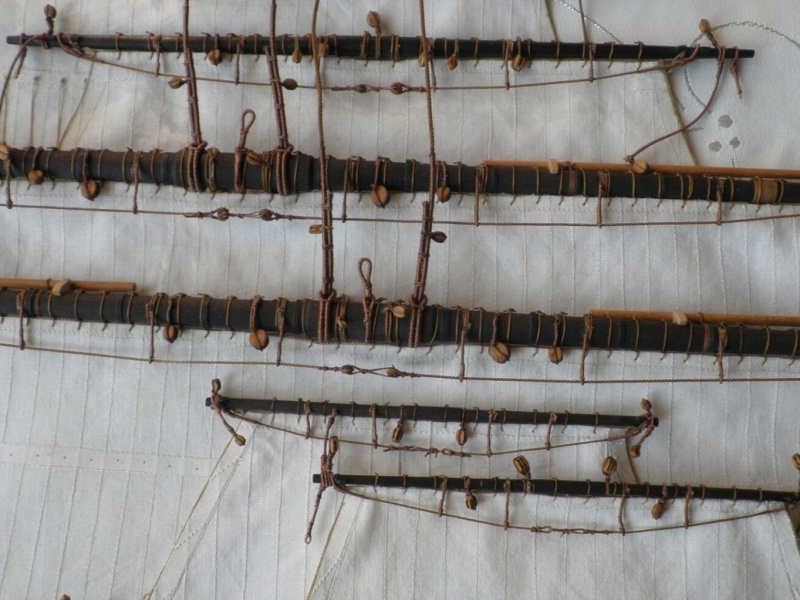
In the picture below you can see the sails properly prepared for installation on the model. The next pictures show examples of finished sails mounted on the model.
I hope these lines will help you in creating your models. Please feel free to contact me with any questions. I will be glad to help you if I can.
I wish you many beautiful models with great rigging!
Source of images:
book - Historic Ship Models from Wolfram zu Mondfeld web - http://www.hnsa.org/